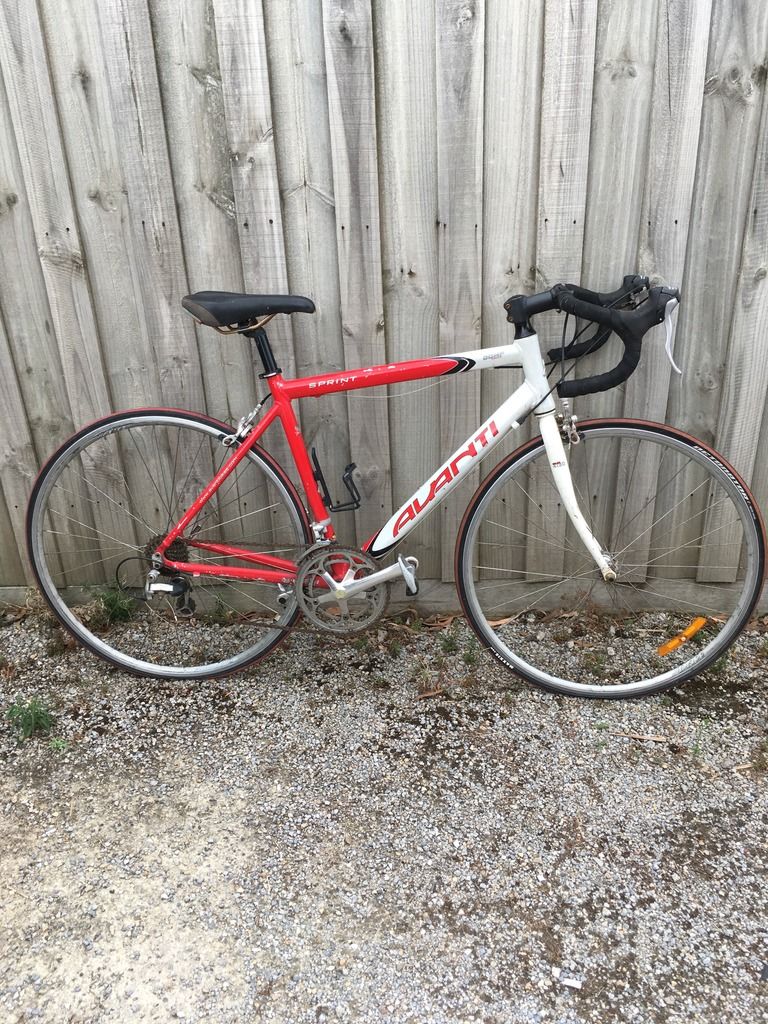
I was up for a second hard rubbish resto , frames in my garage were not suitable for the project until I founds this …
 First up I assembled it , to see if it wasnt too far gone , checked for cracks in the frame …all good , now start pulling apart for the rebuild !
Bike is coming apart easily, nothing too evil so far . The last hard rubbish bike I did was in poor condition , sat in rain , bearings rusted . That’s ok , but where the bearings sit is pitted , just makes the resto harder to save the damaged part
](http://s345.photobucket.com/user/Timothy_Weigall/media/IMG_0754_zpswc8shids.jpg.html)[/IMG]
Oh Man …I always forget which way to turn these , so I’ve drawn a diagram on my shed wall so I don’t forget . I usually crack it with a proper Allen key socket , then I use the T bar to spin it off .
Cranks off , needed some help with the drive side , impact driver works a treat , although you can make a big BOO BOO if you strip the bolts hex head . Crank puller tool works a treat , a must for any home service guy who enjoys messing with their bikes . It’s a seal cartridges unit , first time I’ve seen one up close . So the most silliest thing to do is pull it apart :eek: . It’s was a bit " grain-ee " ( if there is such a word ) think water got into it . Well I’m a tight ass and didn’t want to spend any money , so I pulled it apart , gave it a kerosene bath and ran 100 psi through it . Packed with grease and wow …now , :rolleyes:not quite like new , but I got 99 % of the rusty water damage out and I’m happy with the result .](http://s345.photobucket.com/user/Timothy_Weigall/media/IMG_0757_zpseft7nbkk.jpg.html)[/IMG]
](http://s345.photobucket.com/user/Timothy_Weigall/media/IMG_0770_zpswrxw3rc7.jpg.html)[/IMG]
](http://s345.photobucket.com/user/Timothy_Weigall/media/IMG_0760_zpsz9yum3ma.jpg.html)[/IMG]
 I like to do things proper…and like to be slack too . Well I better open up these bearings and see what’s inside …Ekkkkkkkk!
I was lucky as most situations when the hub is pitted, throw it away . No matter how much grease you use it will always creak !. This one had water but rust didn’t set into the hub . I’ll give it a kero bath , count my bearings , may sure I have a even amount . I don’t mind free ball bearings , my giant road bike has them and all is good but my bmx redline has sealed bearing…and it rolls and rolls and rolls with minimum effort .
Nice work Timmey!
Thanks Dalai .
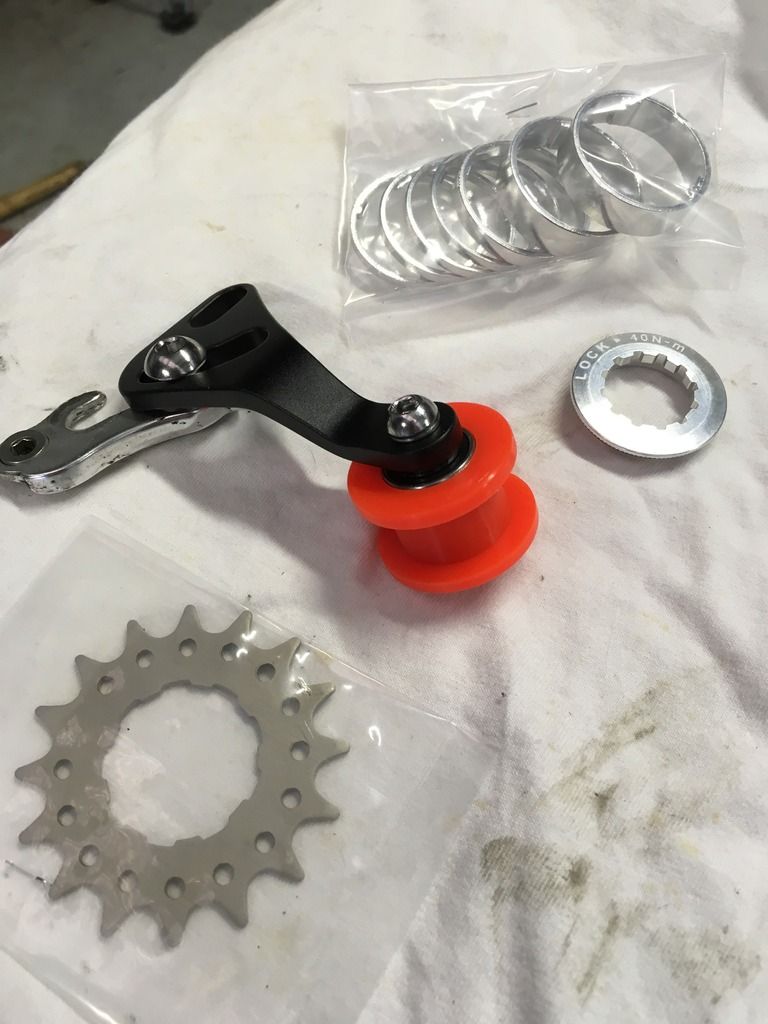
Haven’t been working on the bike for a few days now , been a bit too busy riding and enjoying life . But I did get time to buy this . I’ve read what I can about it and every body gives it the thumbs up…or so they say . The frame doesn’t have horizontal drop outs so I’m only left with this option and it can turn to crap if it doesn’t work . I know it’s not a real ss or street fixie with this attachment , it’s just. A hard rubbish resto 
](http://s345.photobucket.com/user/Timothy_Weigall/media/IMG_0765_zpswjdv37ed.jpg.html)[/IMG]
Time to pull apart the rear axle and yup …YUK ! . Many years of dirt and grass in the bearings . I wanted to get the free hub off too and noticed it is removed with a allenkey . Today’s hubs are removed with a 10 mm key and this one was a bit bigger . My socket keys wouldn’t work so a trip down to the tool shop and got a 12 mm hex with approx 70 mm reach .
Came off really easy as I was prepared for a fight , I used break bar , got angry … came undone with ease … cool !
](http://s345.photobucket.com/user/Timothy_Weigall/media/IMG_0846_zpsm9kqceuh.jpg.html)[/IMG]
A light cool drink always goes well when working on bikes .
](http://s345.photobucket.com/user/Timothy_Weigall/media/IMG_0861_zpsrrecwvwi.jpg.html)[/IMG]
Had a great day today , lazing in the garage , building my bike . I decided not to pull apart the free hub due too I needed anther tool to undo the centre out . Besides ( insert dr evils voice Austin power ) " one million ball bearings would fall out " so I gave it a miss . I dipped it in kero , 100 psi of air and regreased it .
Got all of the bearings back in order , cleaned and regressed , set the cones up and put on the " fixie converter " ( try hard fixie more like it )
I didn’t fully under stand how this could guide your chain to the rear cog with out slipping or rung out of true ??? As I did a mock up , realised it’s angled and directs the chain to one end and then from there you set the cog up with spacers to match the chain alinement …or unless I’ve totally miss something and I’m not very smart …
](Photobucket)[/IMG]
Got the bike back together and doing a dry run before I get it into the paint room ( loose term …it’s me with a rattle can ) any way … I found some bars from anther hard rubbish bike and they worked well with my project . The frame being a 54 cm top tube was a bit too big for me use for drop bars so flat was the way to go . I cut the handle bars down by 90 mm so they are now 500 mm in width . I hope it takes the mountain bike look away to being a somewhat a street bike .
Bike is ok , works well not bad for something for free but I don’t trust the rear derailleur/ chain tensioner . I’ll go for a 5 km ride , put it through some tests and if it lasts , I’m guessing it will be ok for a while.
Plug bar ends. Paint it pink.