This is a project that has taken me a while to figure out, so I thought I’d post the results up here in case anyone is interested in doing the same thing. I’ve put a sequence of photos here.
As described elsewhere, Suntour Superbe Pro track hubs were rather uniquely made, using modified 6001 cartridge bearings. This combined the high manufacturing tolerances of cartridge bearings with the serviceability, and NJS approval, of angular contact cones.
Theoretically this also means that the cartridge part could be replaced in the future, but despite a lot of people discussing doing it, such as Lynn at CTA and others, I’ve never heard of anyone getting it to work, as there are a few catches. The first is getting the old bearing races out, and the second is finding an axle with bearing holders to suit.
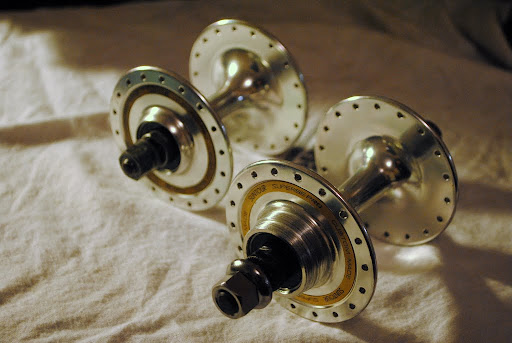
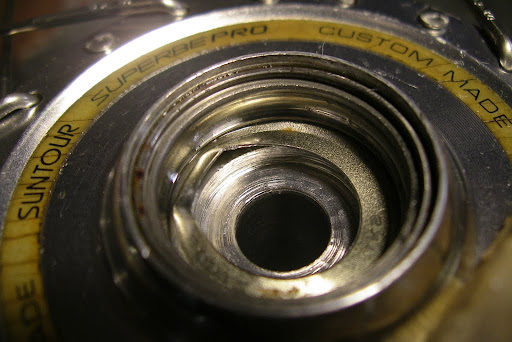
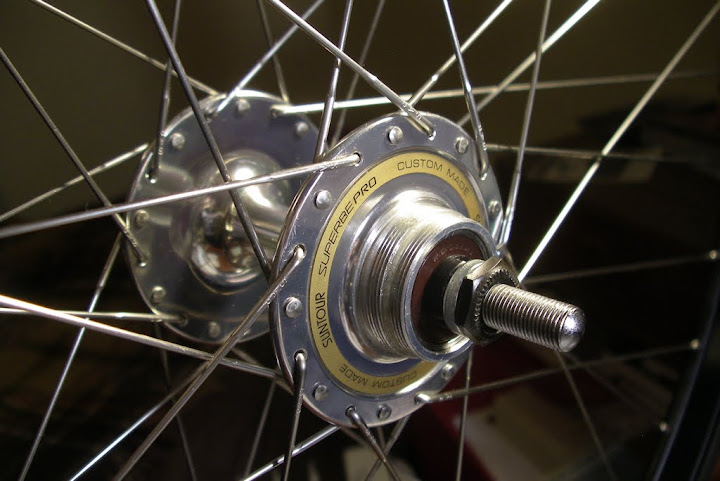
These are the hubs I rebuilt. They look ok but haven’t been looked after, and the bearings are shot.
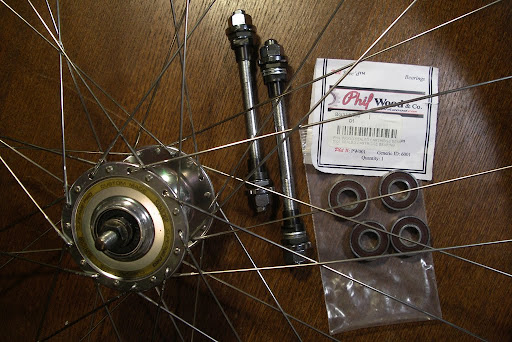
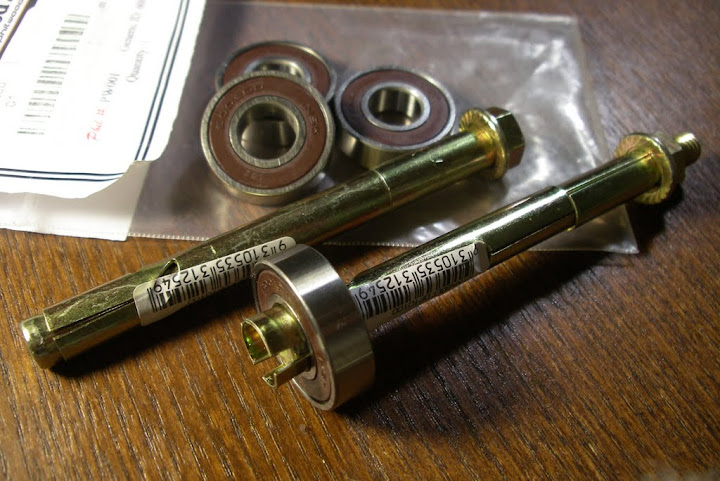
These are the parts required to convert the hubs to take sealed bearings. After a bit of searching I found that Suzue make replacement axles for their ProMax SB hubs, with screw-on holders for 6001 cartridge bearings - exactly right for the job. That’s half the problem solved.
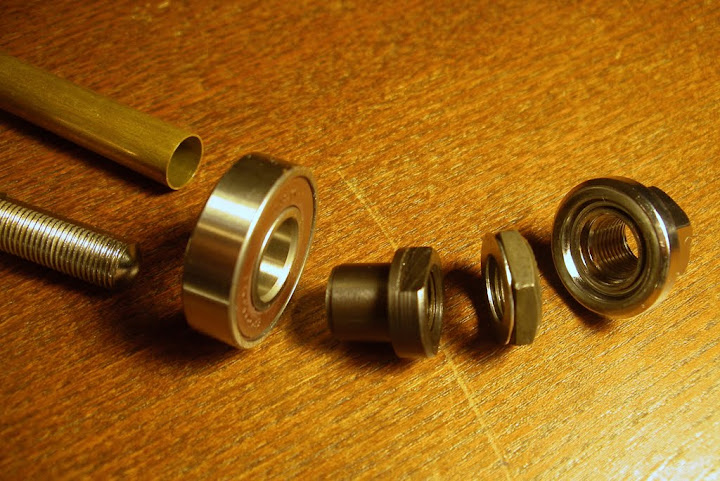
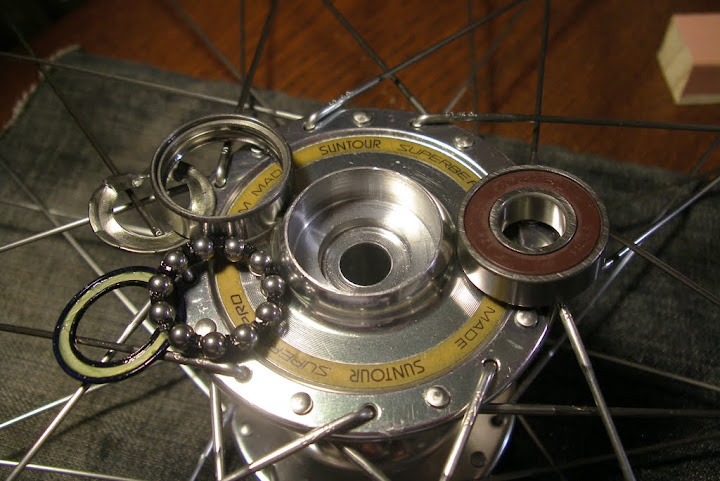
The bearing assembly. The brass tube was an idea for an internal sleeve/spacer to prevent a lateral load on the cartridge, but there wasn’t space for it inside the hub shell.
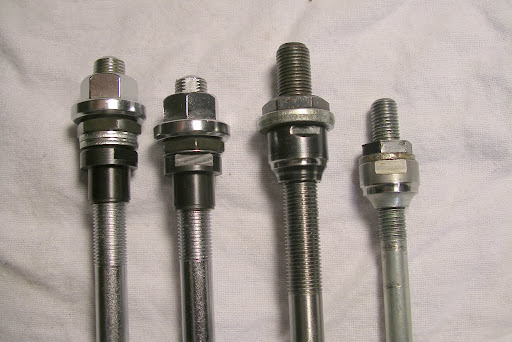
Suzue axles with cartridge holders on the left, Suntour axles with cones on the right.
The old axles were 8mm and 10mm. The new Suzue axles are both 3/8th, or 9.5mm.
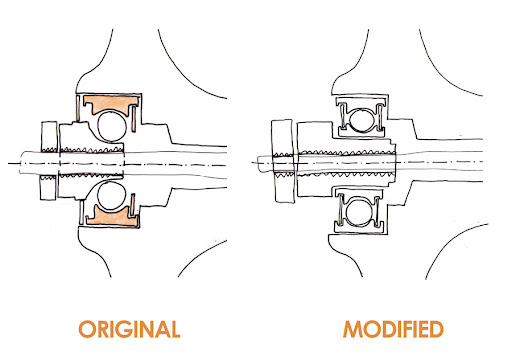
Diagrams of the original cone setup, on the left, and the setup with cartridges on the right. The parts coloured orange are pressed in and difficult to remove.
The trick to removing the bearing race is to pull out the inboard brass shield first, as this leaves enough of a lip to gain some leverage on the race. (See previous diagram.) It took a bit of wrestling with pliers to get it, but this is the other problem solved.
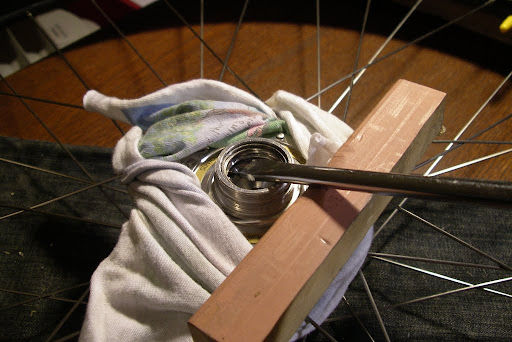
This part took a whole lot of time and patience. The bearing race has to be very carefully levered from opposite directions, back and forth. Also requires more force than I expected.
Out with the old, in with the new. It took more than an hour to get all four of the races out. Pressing the new bearings in was much easier.
One of the finished wheels. Once the new cartridge was in, adjusting the bearing holders took a bit of work too - you don’t want to put a lateral load on the cartridges, and there’s much less feedback compared to adjusting a cup and cone.
So now they’re done. I guess it cost about $90 - $26 each for the new axle kits, and $8 each for the new bearings.
I’m pretty happy with the job, despite my fears of bringing a screwdriver and the old hubs into such intimate proximity. They spin beautifully, they’re pretty much waterproof, and if I manage to wear them out I can easily replace the cartridges using SanEstabans’s handy Dyna-bolt trick.
Given the amount of effort it took, I wouldn’t recommend this unless the bearings in the hubs are already completely worn out. These hubs also have a bit of history for me though. They were my dad’s originally, and then in the early 90s he re-laced them into some 24-inch rims, for my kid-size track bike. He built the frame with Reynolds aero-tubing, the whole thing looked amazing, but I was terrified of the track at the time and just wanted a BMX. As a result the bike, and the hubs, sat around the garden for about ten years. It doesn’t rain that much in Tamworth but it was enough to start them rusting. Hence the need for a rebuild.
