Rad dan, spotlight fabric is probab pretty heavy tho, more pix of the no-sew box here


Rad dan, spotlight fabric is probab pretty heavy tho, more pix of the no-sew box here
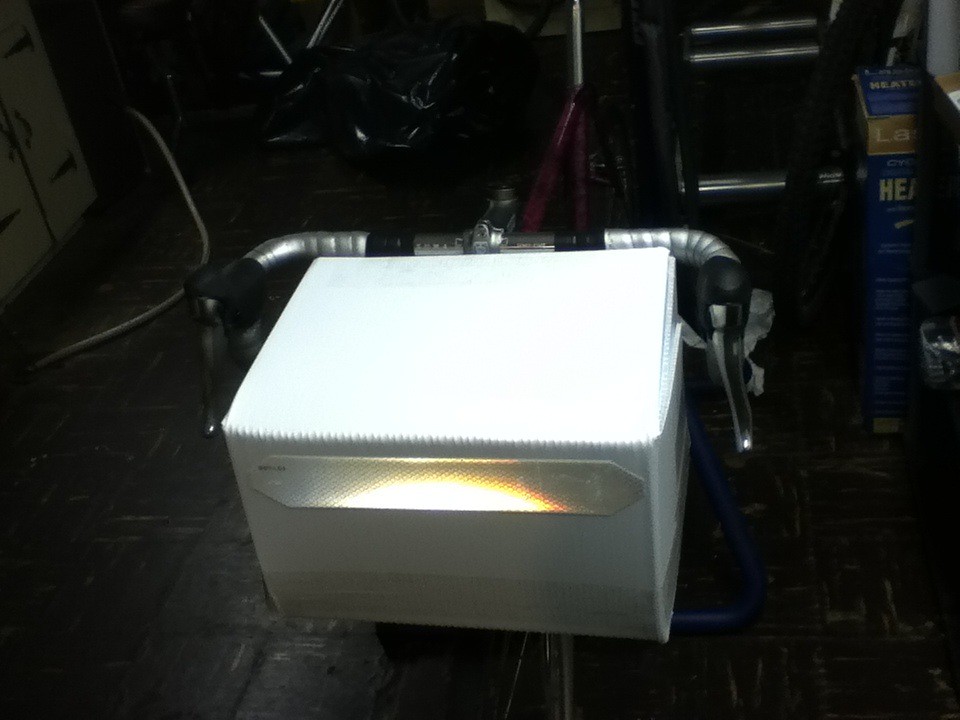
Nice looking corflute box Zach, yours?
Nah, dude from another obscure fixie forum, just thought it looked cooool
Whoa whoa whoa. There’s other obscure fixie forums?
Ocean Air Docena Demi-Porteur bags are up for Pre Sale again.
Black with reflective looks good.
Just a couple of cm too small for my needs.
Back thinking about this again.
Black with some colour flashes/trim, all black, #offtrend Auscam or the newer Multicam or some other variant (urban)?
Also how to hold onto the porteur rack? Wide velcro both sides and front and two straps up and over the handlebars?
I don’t reckon you’ll need to attach it to the bars. Zip tie d-rings to both sides and run some webbing to the rack, then one on the back to the tombstone, shouldn’t move much then.
You could try with a decaleur too but more difficult to remove / re attach
Didn’t someone recently get a bit of help from Dave @ BOGear with attaching some straps to a bag?
And digging around home I found one of those orange and blue BCC Transport bags that were given out to all households. Looks like a good donor of some webbing and clips. Might need a second one.
Remote Repairs should be able to help you put some straps, clips etc on bags to help them attach to a rack. I got a strap on the back of my crumpler, slips over the top of the CETMA rack nice and easily. The flap clips then clip to the front of the rack. not movement.
That mighta been me, Dave made some longer straps with a slip buckle thing
If your in Melbourne contact Marty at elephants and robots. He’s a boss.
Anyone else making progress on the DIY bag front? Will there be the purr of sewing machines in any other households while watching the spring classics on SBS?
I’ve been chipping away at design issues for last couple of months - some interesting problems to resolve! I’ve think I’ve got it sorted and have made a cardboard mockup to test the size. Have collected almost all the bits I need and now ready to try to make NixBag alpha.
Going with a relatively small bag of about 8 Litres, will weigh bit under 600 grams which is lighter than everything else except Swift. Each iteration of the design has made the bag a bit smaller - if this one works I can always make a bigger bag later. Not sure how Swift comes in at around 300 grams they claim - I presume that is without any stiffening.
Not going with decalleur - as I want to use bag on 2 different bike frames and racks. Seemed almost impossible to set up a decalleur on both bikes so bag could just be lifted and switched. So I’ve designed a base clamping system as both racks have the same platform size.
Going for a mix of old and new tech that I hope will be rigid without use of decal, and close to rainproof - basically a sealed corflute box with a cotton canvas covering skin. I could use a lighter, technically better skin than canvas but I like the look of weathered dusty canvas so I’ll give that a run first up, the sealed coflute inner shell should still make inside rainproof.
Still mucking around with mine in my head.
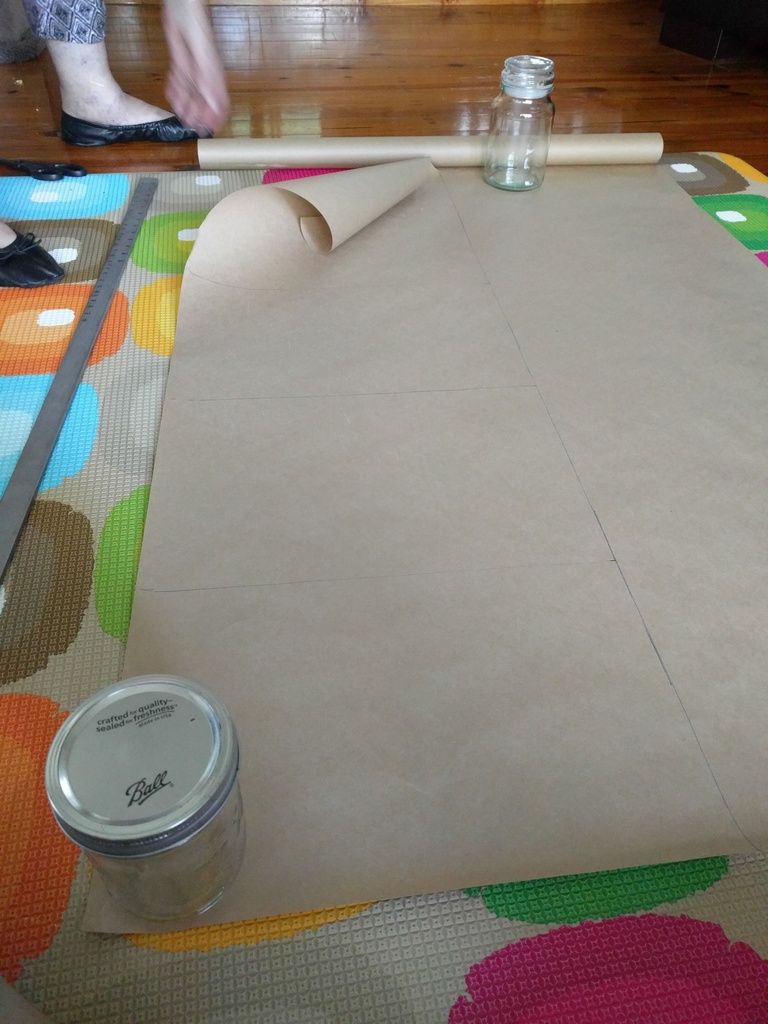
Have picked up some odds and sods, tan coloured canvas (probs not heavy enough), blue coloured bias for edging, 50mm wide velcro, roll of brown paper for pattern making.
Contemplating a lining material but don’t think I need it for V1.
What material are you guys using and where are you getting it?
Not sure who you are asking.
The fabric I am trying first up for outer skin is 100% cotton canvas (also called duck cotton) - I got it from Spotlight. Some people claim cotton canvas is water resistant, but I think it will allow water to wick through to anything in contact with the inside wall of the canvas.
Anyone that’s listening really.
Thanks for the tip, will check it out. I guess you can always treat (Scotchgard?) the canvas if it turns out to be less than water resistant.
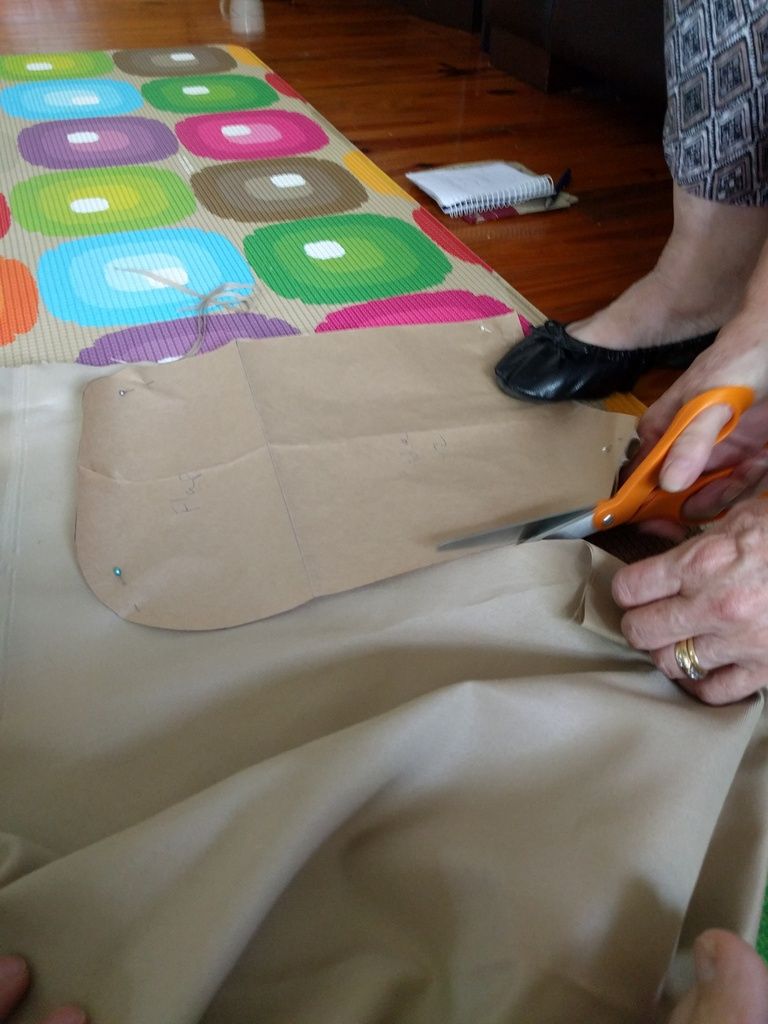
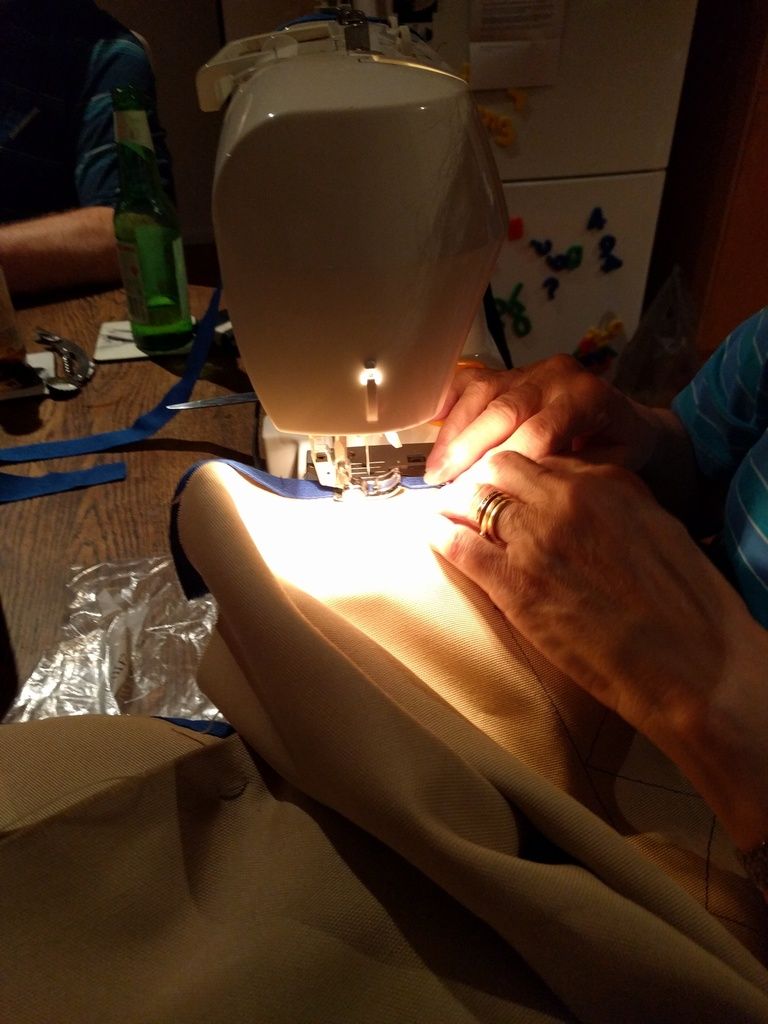
Took advantage of being damaged goods at the moment and the old duck is up for a visit, so we nutted out some design requirements and measurements and made a start on the front bag.
Marking out the pattern for the main portion of the bag on a roll of brown paper.
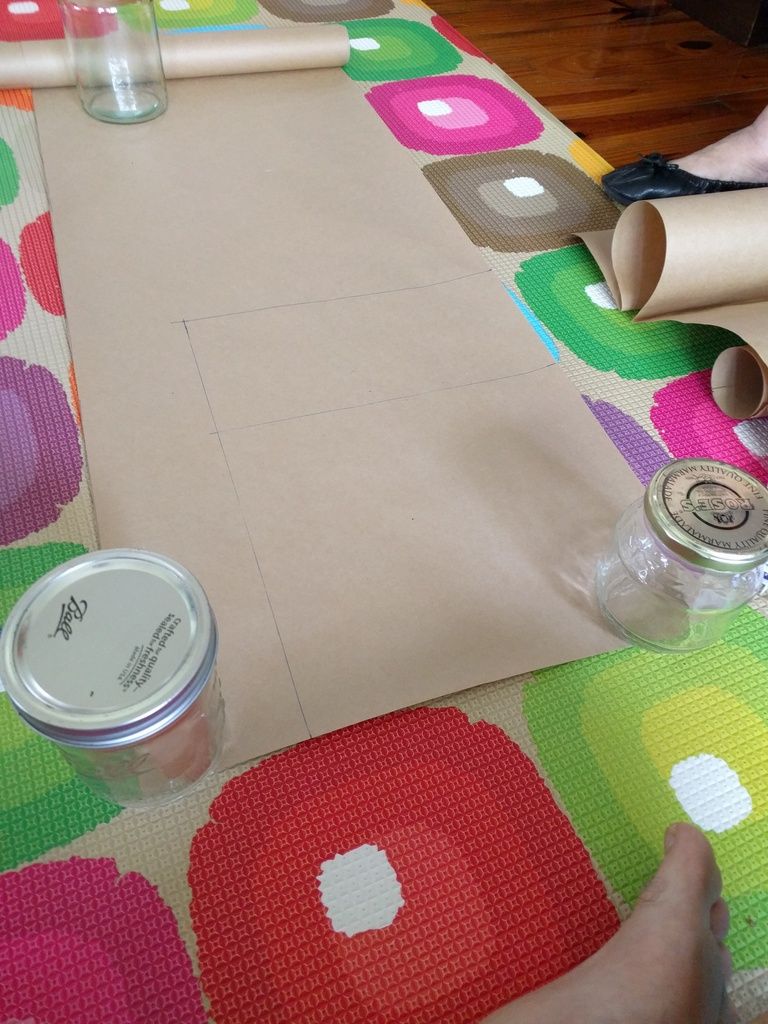
And then the side.
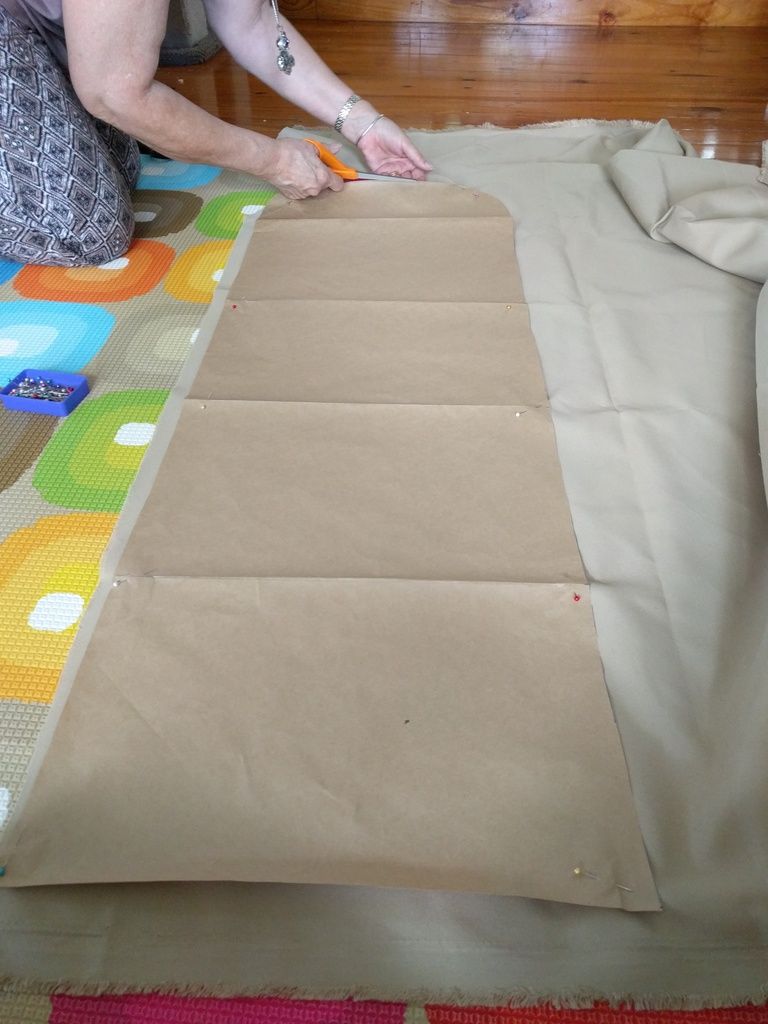
Pattern pinned to the canvas and cutting started for the main portion.
And a doubled over piece of canvas being cut for the sides so we didn’t have to pin it again and cut out two single sides.
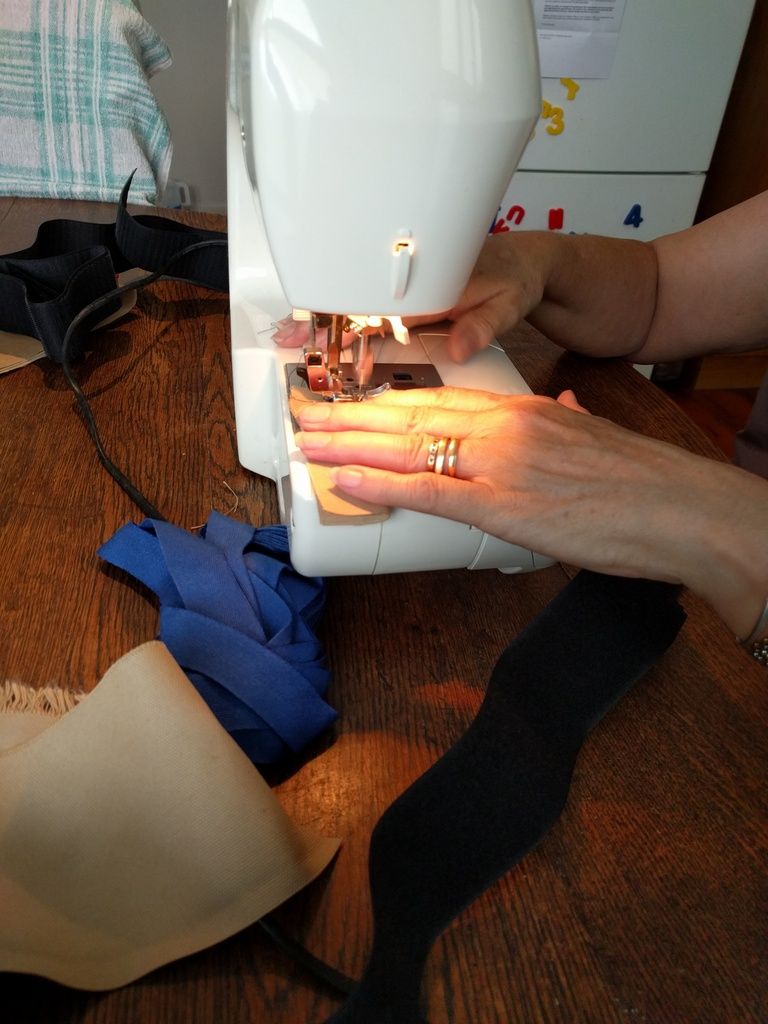
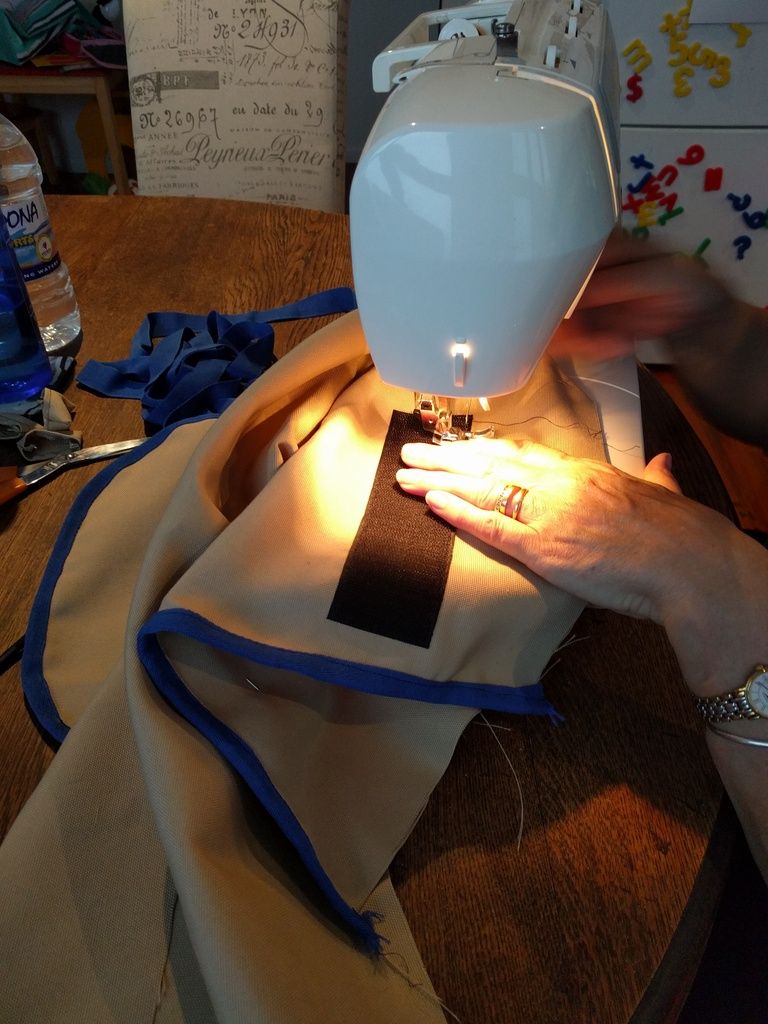
Working on some end tabs for velcro.
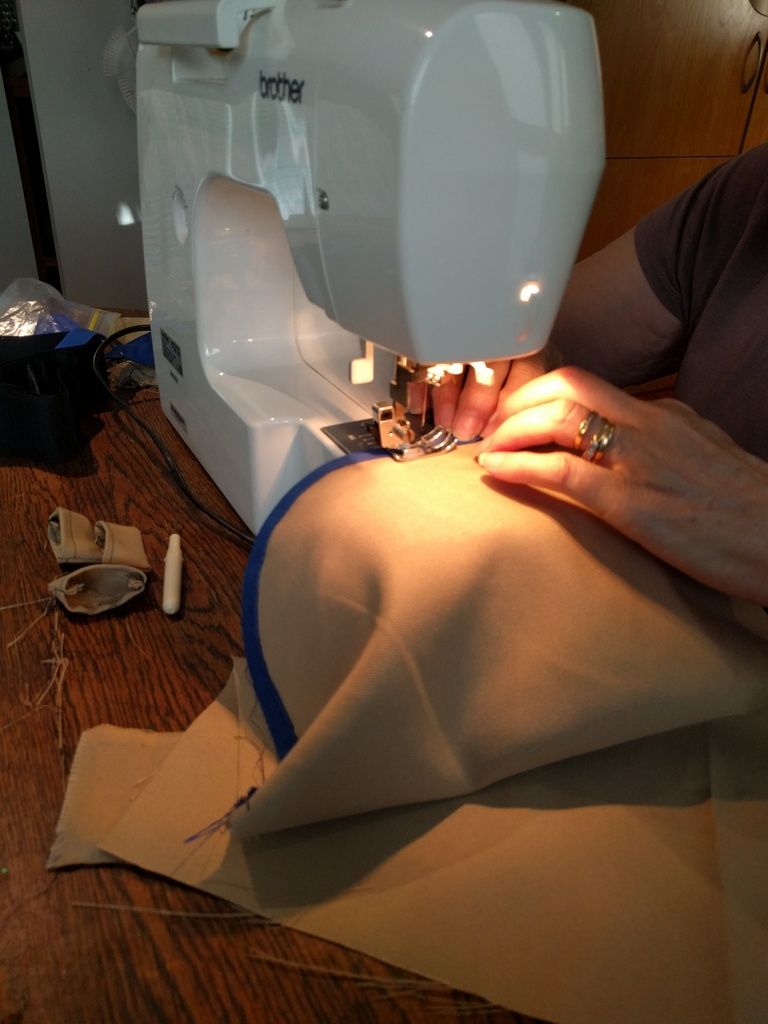
And finally some binding going along the top edge of the side, the curved bit that will fold in towards the centre of the bag.
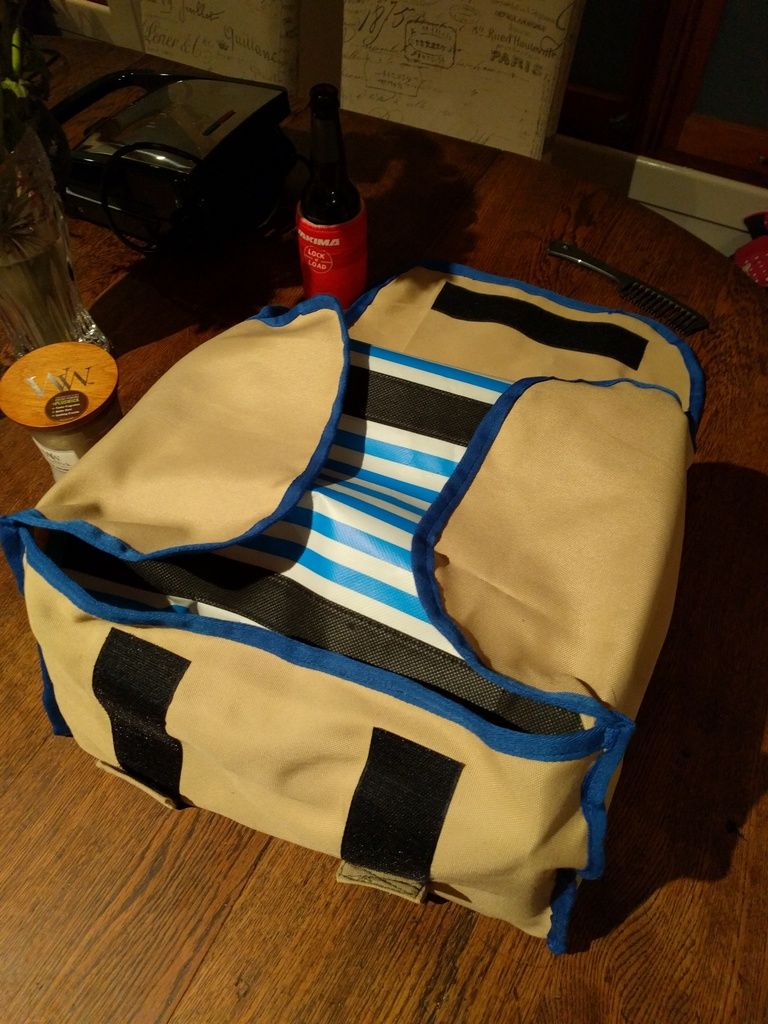
50mm Square of velcro hooks being attached to the side of the bag, for the straps of velcro loops from underneath to come from under the rack and hook onto.
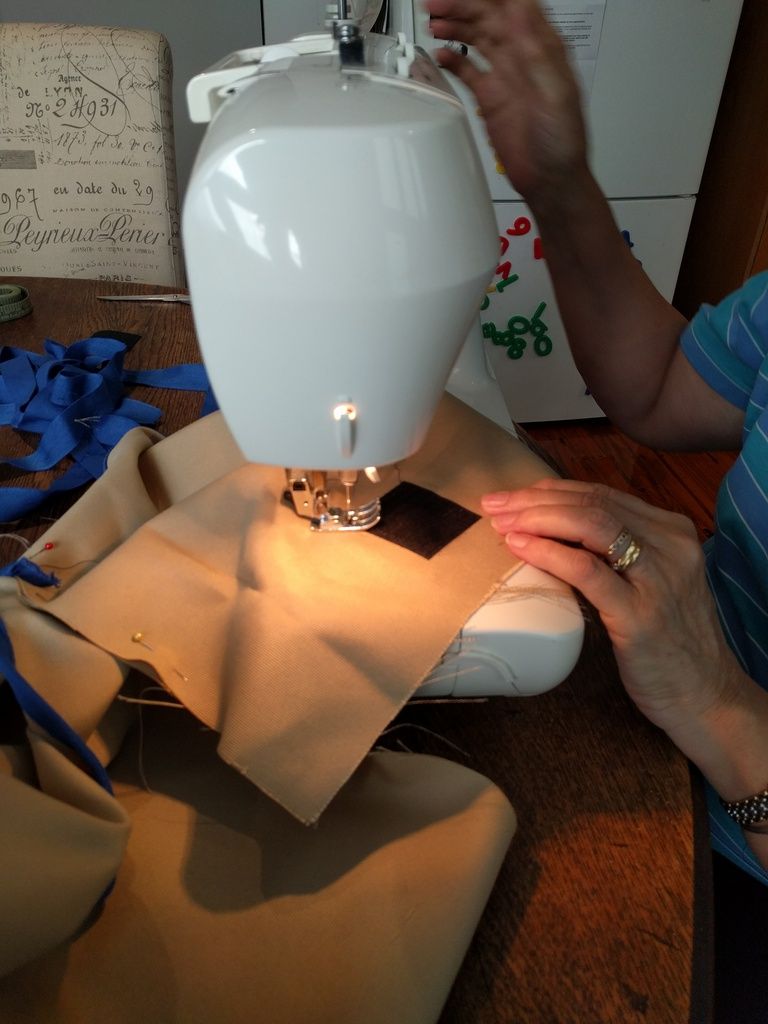
Strip of velcro hooks attached to the front of the bag, works for both the lid and the strips from under the rack.
Velcro loop strip with tagged end to make for easier opening.
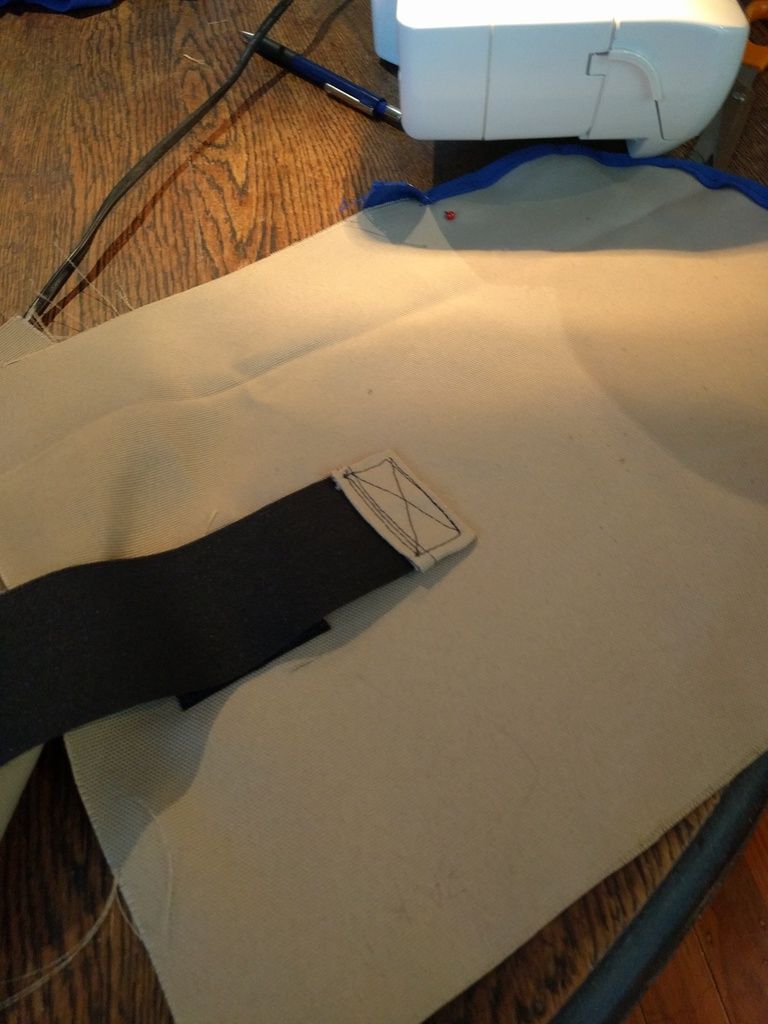
The base of the bag showing strips of velcro loops for the front and the sides.
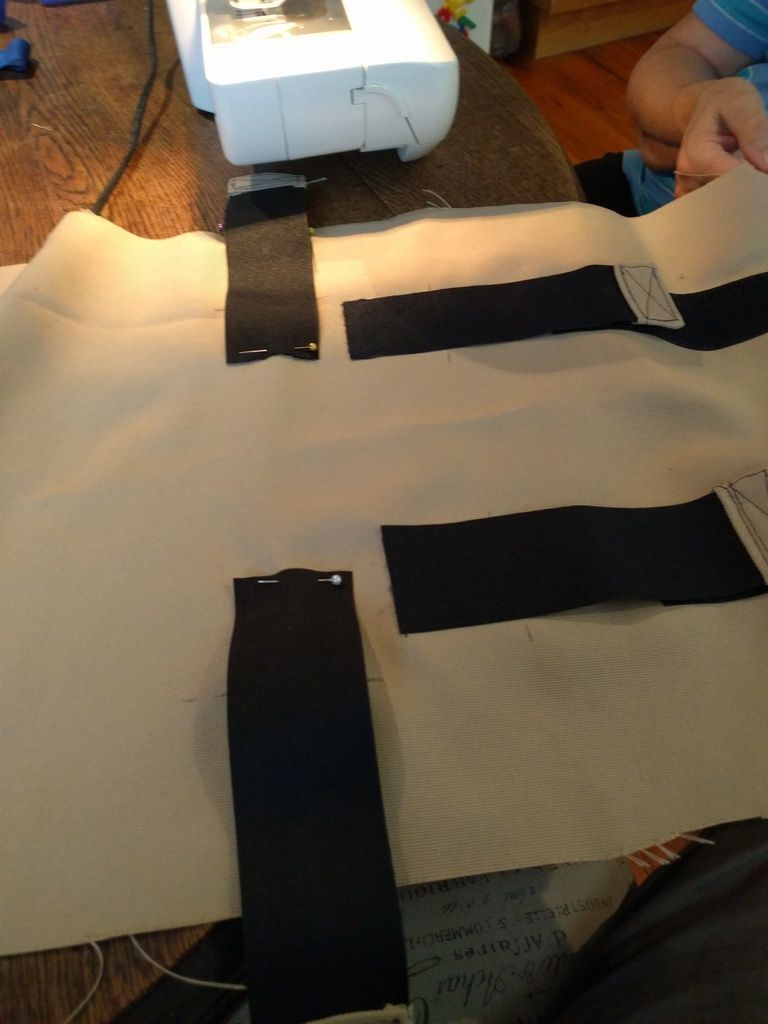
The velcro loops for the lid.
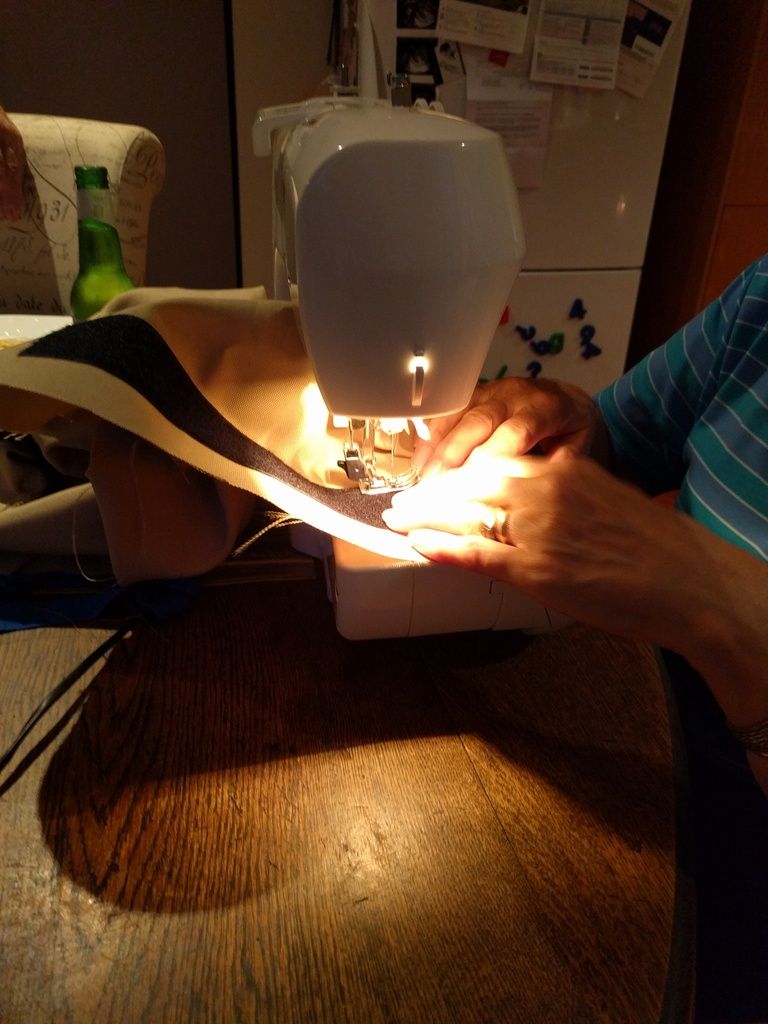
Edge binding, bitch of a job in the corners.
Bag stuffed with another bag. Need to suss out some hook and loops for the two flaps.
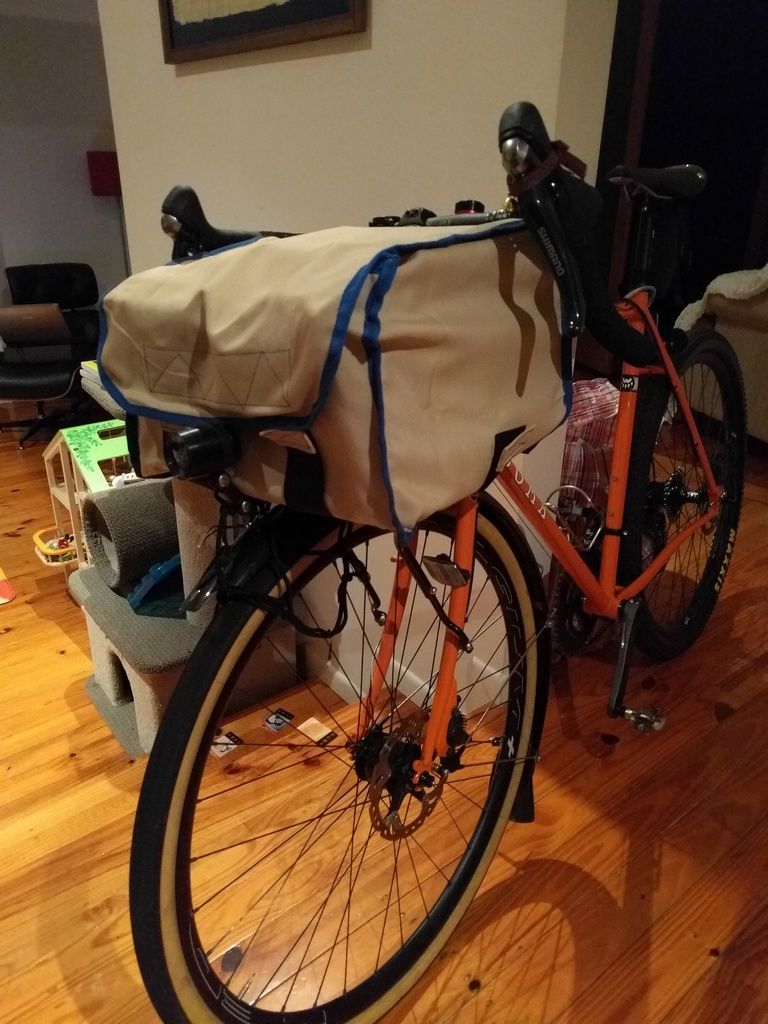
Attached to the bike in the intended usage position.
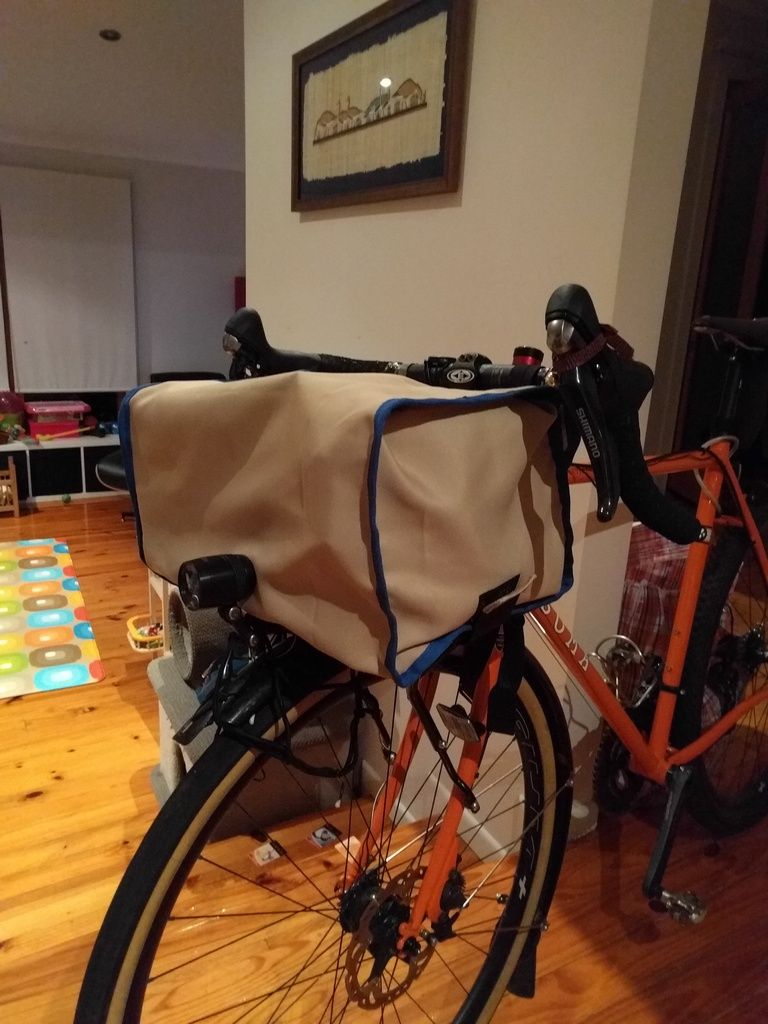
How it looks the other way around.
This is super cool! Are there any internal panels to help with structural integrity?
Not yet, I had planned to grab some corflute from the bloke up the road and build a box similar to Zach’s posted up the thread to give it some structure.